Thursday 26 May 2011

How to create a Psychological Horror film

In order to understand how a psychological terror/horror film works an understanding of what it is will be needed first , so what is it ? Well many people explain the way they feel when watching the films is a sense of unknowing the films rely on a character fears, guilt, beliefs, and emotional instability to build tension and further the plot. An audience will identify with this character as we all have the same fears and emotions.

Psychological horror is different from the type of horror found in "splatter films," which derive their effects of blood and violence, psycho films make you anxious and calm at the same time using specific lighting camera shots and movements you are able to feel what is coming before you see it like in the cases of the films I have had to watch in this project these include The Shining, The Tenant, the Machinist, Rear window and The Haunting(original).

The first film we watched was The Shining which I reviewed earlier on in the blog in this film the vast use of space gave a sense of isolation and being open to attack these types of shots are very common in this genre but it is as much about the set as the technical features of cameras and lighting. The set has to be simple a common place that we feel comfortable in such as a bedroom ,a hallway or a hotel.The film starts to prepare the viewer for isolation with gliding aerial shots of a deserted winding highway leading to the Overlook Hotel these shots remind me of a snake and the evil that it portrays. Another camera angle that works well in captivating the audience is with the use of a "Stedi-Cam which follows Danny's tricycle as he innocently raced around the halls of the vacant Hotel showing further creepy emptiness to the vast space.

The next film I watched was the Machinist a film I had watched previously and enjoyed The machinist" is about a heavy machine operator played by Christian Bale who suffers from insomnia and has his reality breaking down on him, seeing strange characters, eerie notes on his refrigerator and getting paranoid with all his surrounding seeming to turn against him.'The Machinist' is full of an eerie green light, using coral filters on all the lenses and high-key lighting in most scenes, this style is very similar to that of 'Twin peaks'. The claustrophobic camera angles add to this atmosphere and help to enforce the idea that the machinist is living in his own surreal environment. Similar to that of Jack Nicholson’s character in ‘ the Shining’
Visual attitudes of desertion and desolateness are paralleled with Bale's creepy, disturbing-looking thinness correlated with Reznik's psychological state. Insanity slowly creeps its way in to the film you are running with Christian Bale’s character away from his paranoia and mysterious characters which suggest the end to his existence.
In the film 'Rear Window' the Director Hitchcock was a master of suspense without using gore and graphic violence. He scared us with only a camera and some lights. The suspense in the film is based on the unquestionable logic of terror. The story of L.B. Jefferies, a photographer who has been immobilized while photographing a race car crash. His girlfriend, Lisa wants to marry him and tries to get him to settle down, but he is unwilling to give up his adventurous lifestyle for her own high class lifestyle. Trapped in his apartment, he begins to pry into his neighbors' lives by watching through his window. The words curiosity killed the cat comes to mind. All though not my favourite Hitchcock film his work needs no comment as it speak for his self his use of music and camera angles flow and there is not such a use for dialogue you can even see past the shoddy set's. In Rear Window the gentle yet eerie music coming from the Songwriter apartment set a beautiful scene and the use of different colour filters on the camera lens add to the mood.In conclusion to this, through the use of films many subtle things such as the lightning, camera angle and sound be used to create the suspense and fear empathy and terror needed to create the horror in the viewers mind. Physiological horrors often focus on tragedy, entailing madness, conspiracy, violence and even what we would call tragic people, those that we just simple empathise with like in the Machinist. The main Characters aren’t usually the bad guys at the beginning and unusual change in circumstance will change them. The idea is not to scare you but to make you think your not meant to hide behind a pillow but to be on the edge of your seat in anticipation of what the outcome is to this highly built up storyline.


the image above is from ' The Machinist'
The Shining, Stanley Kubrick 1980
The Machinist ,Brad Anderson 2004
Rear Window, Alfred Hitchcock 1954

the fooring


Before i forget the flooring,
Now this was difficult to say the least we started with plywood boards and stained them in the wickes varnish as seen in a previous post. After laying them on the floor with much help from Simon we noticed the boards did not lay flat and we decided to tape them down on the underside and hoped the weight of furniture and rugs would hold them down.
The next problem we had was footprints so i spent most of my time in my socks because the floor just seemed to attract the dust and Simon boots were a big culprit so we had to wipe the floor with a damp cloth and sweep numerous times !
but overall we were very happy with our floor and its colouring was perfectly matched to the panneling.

Lights camera action

This post will show all I learnt from the photo shoots and what i have learnt about using lighting to make a set come to life.
There is usually three main lights in film and TV sets they consist of, key, fill and back light. The key light is the brightest light and casts the primary shadows which gives a direction to the light. The fill light does what it says and fills in any shadows left by the key light this light has no real shadows or direction of its own. And finally the back light. Each light has its own job and they are usually combined to create an overall effect. but they all do the same job which is to simulate the light that might occur under normal conditions in the filming space.

After being taught the three lights, we were shown how they were hung on long stands such as a C stand. They can be extended to a great height and this can unbalance the heavy light so sand bags are added to the base to distribute the weigh as seen below.We then went through all the possible effects that could be created with lighting showing us the different size lights , different filters, and how to properly use the barn doors (the hinged shutters on the front) these get very very hot and have to be handled with gloves !
We were then shown how the camera works they worked explained the different setting such as the effect that the aperture can have on the amount of light there is is a shot.Using poor Vicky as a model we filmed 5 second clips on each aperture setting.
The Lighting can help create illusions, shadows can distort the set and fool the audience.
Through the use of different lights we are able to control: The colour, direction, intensity, harsh and soft lighting, the mood and certain compositions.The difference between harsh and soft lighting: HARSH: Harsh and sharp shadows are created, the light is pretty solid. SOFT: The light is often bounced off a board to create a more subtle highlight and produce a more defused look.

    Gels are put in front of the light to change the colour, the light shines through the gel.The gels can be layered to create different colours set colour correction and set the mood. Once we were familiarise with all the equipment we started to think about how our rooms should be lit.

    How does light effect the atmosphere in a film ?

    'Low key lighting uses shadows and directed pools of light to create atmosphere
    and suspense. It is often seen in crime or gangster movies. Low key lighting
    suggests an air of mystery. Horror movies often use this style of lighting in
    exaggerated form by over-lighting (placing a light above the face) or under-lighting
    (placing a light under a face) actors to create a dramatic or distorted effect.'
    quote from http://www.inpoint.org/pdf/LanguageofFilm08.pdf.

    So finally we can shoot so we started with the Study. We set up a light in front of the double door joining the room to the drawing room this was a fill light effect we began to change the filters and the lights. we got more light in the set, We then tried the reflector technique involving the white board to try and create a softer light but we ended up loosing the detail of the room. it was particularly difficult to get the haunting effect we desired but the room worked well with the use of shadows.
    My personal favourite is the drawing room the subtle orange light make the time frame look around sunset its warm and inviting but feels fresh at the same time as the picture below shows.

    the beginging of the end


    Own photo's of set before final touches once the windows and study had been blacked out using black fabric.

    The next post will show how we set the scene and lighting for our official photo shoot.

    PAINT AND VARNISH !

    Just to show you the varnish used in the rooms for future reference.

    Varnishes:

    This varnish form Wickes was £9.99 in red mahogany used for the window frames and floor.

    What a Tool !

    In this post I will skim through the use of tools and equipment we used in this set build and the health and safety and PPE needed.
    Before you start any job, you need to weigh it up and decide whether to go ahead. Ask yourself:
    • Is it something I can take on myself?
    • Do I have the right tools and protective equipment?
    • Do I need to get in the experts?
    Cutting corners could mean putting yourself at risk, it can end up costing more than you think. NEVER underestimate the difficulty of the job, especially if you are unfit or nervous about heights - get someone else to do it.

    Band Saw:
    Firstly check your PPE as many times i was wearing unsuitable shoes and was sent packing from the workshop. When using a band saw you must never forget your Safety glasses band saw blades rotate at considerable speed, and small pieces of wood can fly out in nearly any direction.
    You should also wear for working with your band saw. Avoid loose fitting clothing, particularly long sleeved shirts, that could get caught in your work or in the band saw blade as you don't want to loose a hand !
    Remember when you start up the band saw and wait until the motor is at full speed before beginning any cut. When operating a band saw, always place the wood flat against the table. Do not attempt to "free-hand" the wood in mid-air that wold just be stupid ! The wood must remain flat on the surface of the table at all times during the cut to make sure you get a straight clean cut.

    When cutting curves, draw the outline of your curve on the wood before hand Then, keeping the wood flat against the table, ease the wood through the saw along the outer edge of the cut line. It is better to leave excess wood outside the line that can be sanded down at a later date. remember to take your time and not rush any cuts especially curved lines as if you mess up it cant really be fixed again.

    Nail Gun:
    As per usual always wear safety glasses there are many simple ways to use a nail gun but so many dangers i thought it would be easier to bullet point the obvious ones.

    • Do not hold the trigger down unless you're purposefully firing the tool. This is especially important when descending ladders.
    • Never point the tool at anyone. Treat the tool like a firearm. Never assume the tool is empty.
    • Do not fire the tool unless the nose is firmly pressed against a work piece.
    • Keep your free hand safely out of the way of the tool.
    Glue gun

    I was going to write the health,safety and correct usage of a glue gun but we aren't that stupid so i thought I'd tell you an interesting fact instead.
    Hot glue guns range in temperature form around 250 to 430 degrees INTERESTING


    Hand Sander

    Using the hand sander was just plain annoying the vibrations made my hands go numb and the dust coming off covered your hands and made gripping difficult which s very dangerous when the off button is situated on the sander !

    Monday 23 May 2011

    from the book to the screen

    Once we had all read the novel of "The Death of Ivan Ilych" we discussed as a group the themes that would have to be portrayed in the set design of Ivan's study and drawing room. As much as it it important to be historically correct and represents the baroque interior and architecture of 19th century Russia the psychological terror and insanity of Ivan that has to be portrayed.

    We looked at how we could portray this feeling that only Ivan had and in many brainstorms over the past weeks the below bullet points are the ideas we came up with:


    • A sense of darkness perhaps hidden behind a screen

    • The use of hands grabbing/creeping up on Ivan

    • A dreamlike state shown by the shape of the room or unrealistic furniture

    • Pain shown as a third person such as an 'IT' like creature

    • The idea of a very large or small room either showing his isolation or loneliness
    The next few post will show how we came from the brains storms to the finished article.

    Throughout the team meetings many opinions were raised and in the case of tutorials our ideas were challenged this was the first time for many of us that our ideas were criticised so thoroughly and at the time there was shock in the group but we now come to see how this benefit’s the group. Bad criticism is better then none and we are able to build upon theses ideas and better our work.
    Working in a group was both difficult and helpful, we tried to play to every ones advantages and all though this worked in most cases it was important to remember that people could not always work to the same ability as your own. I felt coming into this project that I would be the ‘underdog’ but found out I was able to work well if left to my own devices. Our group has some very strong characters who sometimes helped in the order of the group yet there was sometimes a few situations where the entire group didn’t agree and we had to come to compromises that would benefit the outcome of our set. All though working in groups is most people idea of a nightmare I would be happy to do it again but have learnt that there is no point of sulking about not having your idea chosen but to inject your own thoughts and opinions into others thus helping the group and yourself learn the importance of team work. I have learnt that in group work you must not rely to strongly on other people as unforeseen circumstances could be the difference between the wok getting done or not.

    bits here and there

    Fiona cut out the tiles for the heater/fireplace then me and Kirby painted them white then glazed them. Once they were dry we sanded any odd lumps and bumps and passed them to Fiona who had already created multiple designs and they were to be drawn on the tiles using tracing paper a simple process where drawn on one side with pencil the tracing paper is turned over and scribbled over to transfer the design. All the tiles needed to be painted a large group of helped Fiona to quicken the process. We painted over the design with navy blue paint using a fine paintbrush and the passed the tile to another person to paint another part finally ending up with Fiona who painted all the details so that they were all in a similar style they were then glazed to protect them and give them a professional finish. The photos below shows the individual tiles and the finished heater.

    (Photos with thanks to Vicky and Sarah )

    Props that I have brought to the rooms

    One of my favourite items that I brought for the room was a £10 vase from a Charity shop the poor image below shows the vase and the the link below is an antiques website showing the styles of vases and porcelain in the 19th century very similar to mine. I chose this vase because of its pinkish tones and large scale and feel it would fit best in the drawing room due to it colour pallet.


    Link to Antiques
    Another small vase I brought which I found out later to be an urn can be seen below I'm not so confident in this piece as all though it is the correct colour pallet it may be to minimal for the 19th century style of the room.


    I also brought a wall light all though electric it was very fitting with the style in the room it was gold leafed and was a similar colour to the other hand made lights in the rooms.
    And finally a silver plated flower holder and a gold candelabra as seen in the cabinet below

    Wednesday 18 May 2011

    The Shining film review

    Watch my personal favourite scene


    The Shining Film Review
    The first film we watched was The Shining (1980) directed by Stanley Kubrick. The film is based upon the book The Shining by Stephen King it is of course a classic, A film that everyone knows about and many have seen. And one of Jack Nicklesons greatest roles.
    In terms of horror in the 1980s this was massed watched and is definitely a classic physco film, it uses non-diegetic sound, long shots and the use of actors to build suspense. You know something is going to happen but don't know when, this is what makes you think, pay attention and really watch this film.
    The story follows the events that occur at the 'Overlook hotel' during the winter something which automatically makes you think of isolation and cold. Ironically the hotel is closed to the public in the winter due to terrible snow storms that cut it off from civilisation. though not populated the hotel needs to be maintained and writer Jack Torrance a recovering alcholic, his wife Wendy and his psychic son Danny agree to look after the hotel and keep it running. As Jack is being interviewed for the role of caretaker he is told of the horrific tale of a caretaker who, many years ago, brutally murdered his family, knowing that this is always going to repeat its self somewhere in the film and the audience is already prepared for a brutal murder to take place possibly involving the Torrence family.
    Danny has visions which are filled with torrents of blood and gore. A psychic link has been established with the hotel's past, Jack ignores these warnings as is hoping to have a peaceful place to write his book and the Overlook Hotel seems perfect.Little do they know that the hotel is built on Indian Burial Ground and the evil spirits that live in it.
    The film deals with the subject of abuse and betrayal as well as the supernatural it portrays the inner phsyco in Jack Torrences mind. He has already hurt his son in a drunken episode and then Danny is injured and visibly traumatized after going into room 237 Wendy's thinks in must be Jack that has been abusing Danny. The character Danny seem to always be aware of what is happening but is quiet even and still traumatised by the events in which he sees an feels are happening in the Hotel and through Danny the audience really start to feel this fear as he roams the hotels endless corridors on his bike shadows seem to fill darkness creating a sense of being watched.
    The clip above shows how camera angles helps change our perception of the situation as the shot is from behind the child on the bike seem to appear small and the never ending corridor adds to the isolation of the small boy a sense of paranoia of what will happen next, a perfect example of the effect that can be created using long shots and shadows.

    Making Curtains and Tails

    Last Thursday Sarah, Fiona, Callum, and Nicky took to the streets of London in search of fabric shops in Soho,recommended by Henry Jones this area is known in the trade by costume designers and set makers. They visited Borovick Fabrics in Berwick Street Soho and found fabrics for the baroque drapes in the drawing room. We needed 16 ft for the pair Eventually they chose a rusty pink ( though I think its more terracotta as seen below) with an appropriate baroque golden design.They then brought this and a few metres of a pink silk seen below which will be used make the tails and also to blend in the rusty pink of the wall paper. Once they had found the Drawing room fabric they then searched for the Study and discovered a rather expensive £44 pm of Fibre Naturella red velvet with embroided details this fabric is rich and expensive and suits the Study setting perfectly as seen in the imasge below it has beige, gold and green floral detail which is another texture and pattern to add to the room. Constructing My Curtains and Tails:
    I began by measuring and cutting out the Drawing room fabric I started by cutting two cuts of 8ft 9" the 9" excess makes up the hems and turnover.
    After I had cut the Drawing room curtains out I noticed there wasn't enough of this fabric to make the tails out of it so I then decided to use the dusty pink silk and cut out my tails using a paper template which I made at 4ft long the image of this template can be seen below. I then cut out the tails. Cutting out one tail in fabric and in lining, adding 5/8 inch (1.5cm) seam allowance all round the pattern i then flipped the test tail over and cut out the second pieces of fabric and lining, as the mirror image of the first. 
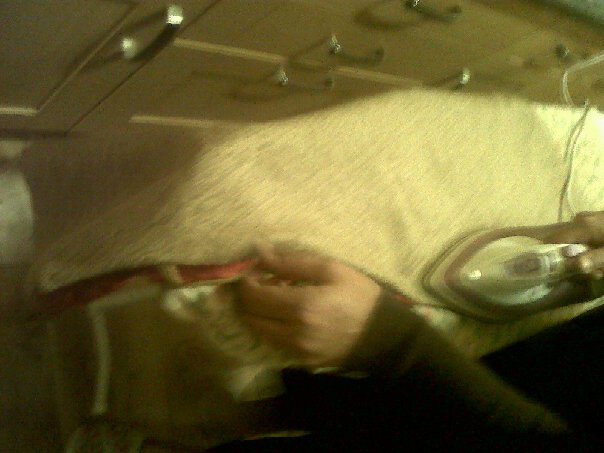
When making up the tails I had to machine the right sides together and edges matching, stitching the lining fabric to the main fabric down both sides and along the slanted lower edge, leaving the top edge open allowing me to pull the fabric through.


    I then trimmed the seam allowances and clipped across corners before turning the right side out and pressing them. I then attached fringe to the edge of the tail and began to pleat the tails into shape to do this I folded each tail into evenly spaced pleats and pinned and then tacked them together across the top. I finally machined across the top to hold the pleats in place and pressed the folds to remove creases. I then repeated this process to make a matching pair of tails and then made a tail for the Study.

    I then made up my curtain for the Study at the same drop of 8ft adding heading tape to create gather these would be pulled back to frame the window. Making these curtains was very simple expecially as they were not lined and im now confident in the process of curtain making and tails.
    The tassels above are the tie back for the curtains I tried to match the friniging as well as I could from this photo.


    ( a mixture of my own photos and that of our unnominated photographer Sarah Laker)

    Curtain Research

    History of Curtains:
    Drapery goes all the way back to the Middle Ages as a way of blocking out the light furs,skins and membrane were used to cover small holes in caves.
    Until the late 16th century in England, window curtains were virtually non-existent. Instead, internal wooden shutters were used to keep out light and cold. When curtains did finally make an appearance, they were made from one piece of fabric hung on an iron rod from iron rings sewn onto the fabric, and drawn from one side of the window only.During the Middle Age, fabric was so expensive that only the upper class used it as curtains
    But in the Industrial Era, the development of textile trade drove fabric prices down making fabric curtains available to the middle class. Window curtains were still rare in 17th century England, normally found only in important rooms in grand homes. Shutters were often used on the first and second floor windows of townhouses for privacy. Keeping out the cold was a constant worry, so that sometimes special window cloths were hooked into the window recess at night in order to keep out the draughts.
    Yet when the Glass Industry came, houses were installed with glass windows and required fabric curtains or window blinds to protect the people inside from heat and drafts and prying eyes. Fabric manufacturers increased their production and lowered their prices as the demand for it greatly increased. This paved the way for the common person to buy their own fabric curtains. Drapery was the most fashionable type of curtaining in the Neoclassical period. It consisted of several pieces of fabric put together to give the appearance of one flowing piece. One or more swags would normally go at each end, with the joins disguised by trimming

    Style in the 19th century:

    Something used widely in the 19th century was to make a long pelmet of many swags and tails to hang across more than one window. Particularly in England this way of draping most of a window wall in fabric became very popular it framed the window and a sense of wealth was created instantly the original designs for Empire style curtains are incredibly complicated with swags of different colours we hope to recreate the elaborate style of swags and tail in our set.
    The highly improved dyeing and printing techniques of the early 19th century resulted in more realistic colours for floral designs, as well as in vastly reduced prices as textiles were produced in bulk. This resulted in the decline of Britain’s silk industry.
    From the middle of the century a number of new dyes were available for yellow, purple and blue-green.

    Fabrics:
    Velvets, brocades and silks and satins were all used to frame a window and add drama to the parlors, salons and dining areas of the wealthy members of society.
    Beautiful silk velvets had been produced in Italy since the 14th century, but by the 15th century the Italians found themselves competing with the French in the production of these exquisite fabrics.
    Motifs on fabrics were popular, especially in France, and featured Napoleonic bees, swans, laurel wreaths, crowns, lyres, vases, eagles, and oak leaves. When the monarchy was restored in France, Empire ornaments on fabric designs were altered, with the Fleur-de-lis replacing the Napoleonic bees. Elaborate brocaded silks were no longer fashionable, although other silks were still popular, as were tulle, lustrous taffeta, velvets, damasks, satin, printed linen, sprigged muslin and printed cotton chintz.

    Asymmetrical patterns replaced symmetrical designs during the early part of the Renaissance, with designs showing movement becoming popular, e.g., floral scrolls, birds in flight and running animals. Damask was a favourite material of the period. Although traditionally made of silk or linen, damask was also woven in wool or a mix of fibres. Linen damask evolved when the Flemish linen-thread weavers of Bruges copied the patterns of the Italian silk damask in linen thread.

    Italian and Flemish weavers were established at Fontainebleau to weave intricate tapestries, and in Lyons to produce silk. Silk was woven in England from the early 1400s, but only the wealthiest households could afford it, so wool and linen remained the fabrics of popular choice. The first indiennes - brightly coloured hand-blocked and hand-painted calicoes which were colourfast - were introduced into France from India at the end of the 16th century, and were immediately popular. As dyeing techniques spread into the West from the East, the colouring of fabrics improved, although European block-printing techniques remained crude for some time

    Accesories and Detail :
    Trimmings were rich and ornate. Braid was large and stylised with a variety of decorative motifs. Gimp braid with clusters of bobble fringe was fashionable.
    Fringes were usually deep and topped with braids bearing geometric patterns or appliquéd flowers. There were ornate bullion or ball fringes. Per
    Tassel tops were arrow-head in shape or domed, with long skirts. Some tassels were severe and stylised, appliquéd with golden leaves or shells.
    Contrasting linings, corded edges, dark silk fringing, embroidered panels and trompe l’oeil valances were all features of this period, and bell pulls with braided edges, appliquéd centres and tassels were very fashionable.


    Reference:
    Jenny Gibbs, Curtains and Drapes: History, Design, Inspiration. Cassell Illustrated; New edition edition (9 Dec 1999)

    Images: www.selectionfurnishing.com

    www.cviias.com
    www.supplierlist.com

    Making our Drawing room look bigger !

    In this post I will be looking at tricks of the trade which will make our small set seem like a lavish drawing room but how we can make a small room look bigger?

    Small rooms can feel confining and uncomfortable and for the drawing room this is not what we want. Luckily for us we can utilize certain design concepts that fool the eye and make our rooms seem much bigger and spacious. Some solutions for small spaces, that can make a room in your home look larger are color techniques, furniture arranging, and lighting considerations can give the look of space and as this room is meant to be a grand drawing room we need to take this into account.
    It is all about illusion. Light colors make your room look bigger and brighter. Light and brightly colored walls are more reflective making a space feel open and airy, which will help to maximize the effect created of natural light which we are unable to have in a set. for this effect we need to select soft tones of blues and greens and pastel colours such as pink.
    another way to add detail to our set and keep it light and is airy is by painting our walls light and using dark colors for the border and trim, in our case our panelling is a dark walnut/mahogany.
    another trick with colour is to paint our wall trim and moldings a lighter color than our walls. if we painted our moldings light, the wall would appear further back, making our drawing room appear bigger.
    In our set we decided on pale pastel pink with a slightly darker print to create a wallpapered effect this colour was authentic to the period.

    Whilst in the study we needed to use darker tones to create shadow and the sense of darkness to reflect Ivan's state of mind.
    Dark colors absorb light, making the room look smaller which is a desired effect for this room. (more information on the wallpaper of the rooms in later post)
    (image on left jenny and rhyan painting the dark green walls of the study and lighter green stencil)

    Also the use of furniture can also make our room look a lot smaller then we want using known tricks of the trade to create space yet still having the antiques and furniture we need to set the scene the following tips have helped shape the Drawing room.

    Placing the large pieces of furniture against the walls opens up the space. allowing room for smaller side tables and chairs to fill the middle of the room.

    Making sure that the scale the furniture fits the size of the room and doesn't block walking pathways. With furniture and accessories blocking the view into a room and out to open spaces, a room will look cramped. By moving furniture out and away from walkways, you’ll open up the space and make it feel larger. If you can see the floor, the room will look larger. Having over sized sofas or too much furniture will make the drawing room look smaller and his room is not meant to be small !
    Setting our furniture at an angle works because the longest straight line in any given room is it’s diagonal. When you place your furniture at an angle, it leads the eye along the longer distance, rather than the shorter wall. And finally choosing a sofa and chairs with open arms and exposed legs allows light to filter under the furniture, making the room appear airier. Luckily the furniture period meant a lot of exposed wood and and legs of chairs and love seats showing.
    Mirrors can also make our room look larger. Using a focal point and angling the mirror towards it, which will give the illusion of depth. The mirrors also reflect both natural and artificial light to make a room brighter during the day and night. They bounce light deep into the room, making it appear larger. This is especially effective with near a window so the outdoors can be reflected. Mirrors on the walls and glass tabletops will make it seem like there’s a more open flow.We could also use mirrored cabinet doors to make spaces feel large and uncluttered. in this specific styled room we will use a lot of guild mirrors which not only help create extra light but will create a sense of wealth.

    Researching light and the use of mirrors i came across a very well known room in the same period called the Hall of Mirrors located in Versailles France some where i have visited recently the photo below is one of my own.
    finally using the natural light from a window what in this case we wont be able to get a rule is that you Make sure window coverings are sheer, or are pulled back, to bring more light in. hopefully we will be able create the appearance of light outside the window using set lights.